Using more Github features
Contents
Using more Github features
You now have your repo set up and you probably want to know how to add more stuff to it and use some of the useful features that it contains.
Adding more folders, files and commits
To create a file inside a folder, you need to:
Click on the add file button and then create a new file.
This will give you a blank file to edit.
When naming the file, you first type in the name of the folder and then a forward slash, followed by the name of the file. Write the name in this format - ‘folder-name/file-name’.
You can now edit the content of the file.
Save your changes using the commit button and remember to type a commit message to help you remember what changes you made.
This file will appear in the folder that you named. You will be able to see the folder on your landing page. If you click on the blue folder symbol, it brings you to the files within that folder.
Explore the ‘Insight’ features of Github
On GitHub, navigate to the main landing page of the repository.
Under your repository name, click Insights.
In the left sidebar, click “Community”.
Here you will find other file recommendations that you can add in your repo. These files are useful when working with collaborators or members in your community. Specifically, look at ‘contributing’ and ‘description’.
Whenever possible, add a few lines as ‘code of conduct’ to make your project welcoming and inclusive for others.
Other interesting things to look at are “Contributors” (those who contribute to your project), “Traffic” (who and when visits your project page), and “Commits” (a timeline and number of commits made on your project).
Explore ‘Projects’ features of Github
Project boards on GitHub help you organize and prioritize your work. It is a kanban feature to track your tasks with to-do, in progress, and done columns.
This is what a repository looks like when it is set up as a collaborative project workspace with a website.
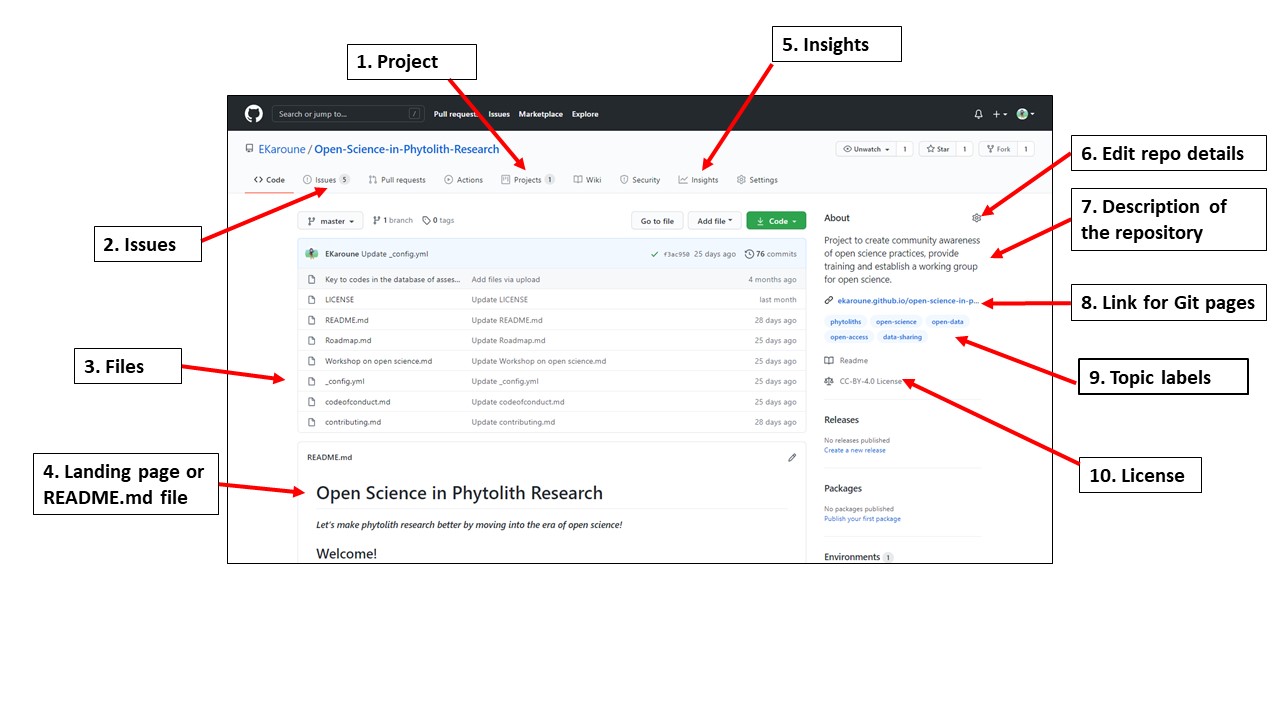
Fig. 70 Annotated diagram of repository after making it into a collaborative project.
Labels on the left-hand side of the image:
Labels on the right-hand side of the image:
5. Insights: This shows you all the activity that has happened on your repo.
6. Edit repo details: You can write a short description of your project and add labels.
7. Description of the repository.
8. Link for Git pages: Website generated by this repo.
9. Topic labels: Topic labels related to your repo can help other people find your project.
10. License: The license that you have put on your repo.